Tuesday, May 17, 2011

Shabby to Chic!

Well, it is one of my favorite times of year—garage sale season! I have found some fun buys this year and am excited to spruce them up. Here are some cute canisters I found. They were originally going for $6 for the set, but the lady informed me she was going half price on all her home décor items. For 3 bucks these babies were sold:


Now I admit, they aren’t much to look at right now, but I brought them home, got out my cricut, and went to work.


Using black vinyl, I added an outline to each canister first:


Then, I cut out the words coffee, tea, and sugar and stuck them on (I admit-I did want to put “coffee” on the large canister because I love it so much, but I didn’t):


Such an easy and fast way to transform these canisters from shabby to chic!


Lexi


linking to:


www.iheartnaptime.net

Saturday, May 14, 2011

Bloom!

I am having so much fun with all the cupboard doors and drawer faces my dad gave me! Over Easter weekend, my dad helped me make these shelves:http://www.beneathmyheart.net/2009/08/cafe-shelf-tutorial-and-giveaway/. I knew I could use one of the drawers to make a cute little sign for one of my shelves. This is what I started with:


I used my cricut to cut out the word “bloom” on brown vinyl.


Using transfer tape I applied it to the drawer.


I added some blue, pearly beads I got on clearance at Michaels to the “b”


Then I made some flowers out of jute and felt for the corner. I made some leaves out of some scrap fabric and added a pearl to the center of the flowers.


Here is the finished product:


Here it is in its new home:


I am really loving the new shelves in my spare bedroom!


Lexi


linking to:


www.iheartnaptime.net

Friday, May 13, 2011

Onesies Galore!

So it has been a while since I have posted anything, but between my computer getting fixed and other things going on, I just haven’t got it done. I have been working on things though! Here are a few onesies that I have been making. These are all for sale, so if you need a baby gift or just want one for your on cutie, e-mail me at remnantsdiy@gmail.com.


I made this cupcake onesie with a matching hair clip for my niece who is turning 1 next week. I know she will look so cute in it! I do have more of these.


The bottom one is red, white and blue. Thought this would be so cute for memorial day and the 4th of July. I also have red, white and blue headbands for the little girls.


I have other fun tie patterns too!


Hope you all have a great weekend!


Lexi


linking to:

www.iheartnaptime.net

Saturday, April 30, 2011

End Table Re-do

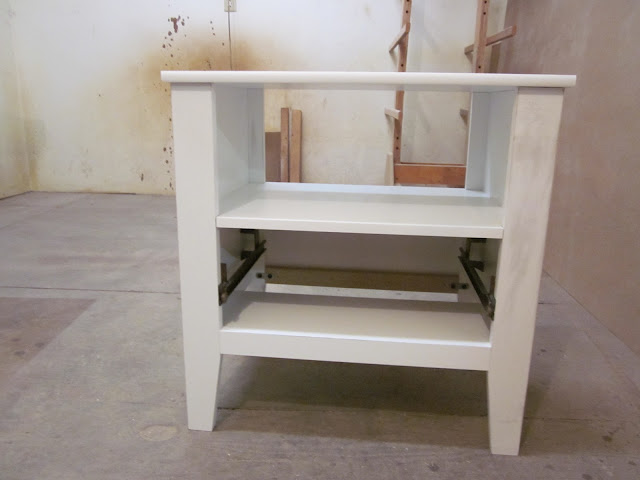
A few weeks ago, I made a trip to Goodwill and found an end table that needed a little TLC, but would be perfect for in my guest bedroom. I wish I would have remembered to take a good before picture! The top was coming off and there was a large gap between the drawer and the support bar. So, when I went to my parents’ for Easter, I loaded it up to give it a makeover.


First my dad figured out why there was the gap by the drawer. Turns out someone put the drawer slider hardware (sorry for my lack of technical terms here) on the wrong sides, causing the gap. Then we tightened the screws for the top, and it was good as new and ready for paint. First, I sanded it down.


Then, I gave it a couple of coats of cream paint. I also added a scrap piece of bead board to the back of it. Finally, I sanded the edges to give it a little distressed look. I found the blue knob at Lowes-it matched the comforter perfectly.


Still need to find some decorations to make it just right, but it will come together!


Lexi


linking to:

www.iheartnaptime.net

Easy Wall Art

I’m back again with another project that I did last weekend. This will also be going in the nursery at my parents’ church. This is so easy!


Here’s what you’ll need:


canvas-I get mine at Michaels


fabric


staple gun


Basically, you just wrap the canvas like a present and staple it in place. Yep, its that easy!


Here is another one I did for my sister:


I can’t wait to see both of them hanging up!


Lexi


Linking to:


www.iheartnaptime.net


Tuesday, April 26, 2011

Easy as ABC

Hey Guys! Sorry I have been slacking at posting my projects, but over Easter weekend I got a ton done and will have a few fun new posts to share with you.


My mom asked me to help her decorate the nursery at her church a few weeks ago and I was so excited. I love, love decorating baby nurseries! I started flipping through some Pottery Barn and Restoration Hardware catalogs for ideas. I found this in restoration hardware:


While I wasn’t in love with the ducks, I loved the frames and knew the perfect guy who could help me make them…good old dad! I had a fun idea for the frames and couldn’t wait to get started.


I did a horrible job at taking pictures throughout this project—just had too much going on. To make the frames, we just used some scrap wood that was 1 inch thick. We (ok, my dad) cut it down to be 4 inches wide. We left the middle hole 4”x6”. We glued and screwed them together and they were ready for paint. I only ended up getting them primed-this was one of my last projects of the weekend-but I put them together to show you what they will look like:


I cut down some fun scrapbook paper that I had on hand to fit the hole. I cut out the letters on brown vinyl with my cricut and stuck them on. Aren’t they going to look cute in a nursery? Here are close-ups. Remember, they are not painted at this point, just primed. They will be painted an off white and be hung on beige walls.


Fun! Check back this week for more fun projects for the nursery.

Lexi


Linking to:


www.iheartnaptime.net

Sunday, April 17, 2011

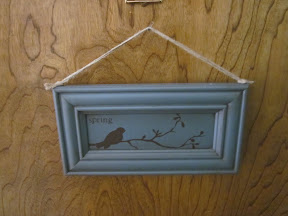
Door Decoration

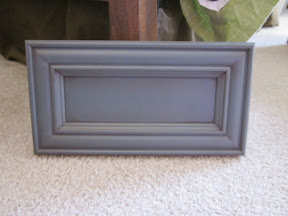
Hey guys! I have a new fun project to share with you today. A while ago, my dad gave me some cupboard doors that his company was going to throw away (gasp). A couple of them had a cupboard door on top and a drawer attached to the bottom (to show finishes and such). I had my dad separate them for me which left me with this:

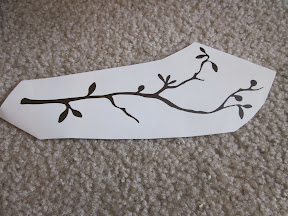
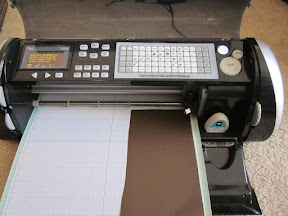
I loved the blue color and decided to make it into a door decoration and put a bird on it (yes, just like that lovely video someone showed me and now I think of it every time I buy or put a bird on something). I got out my cricut and first cut out a branch.

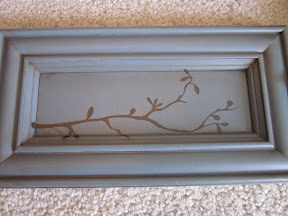
I used transfer tape to put it on the sign.

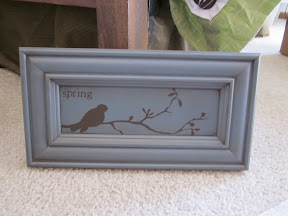
I used an exacto knife to cut off the pieces that didn’t fit. Then I put the bird on and added the word “spring.” I figure I can peel that off once summer hits.

I used jute to make a hanger and hot glued it on top.

I love how it turned out!

Lexi