Showing posts with label decorating. Show all posts

Monday, March 5, 2012

Made it Monday: St. Patty’s Day Frame

Can I just say I love the dollar frames from Michaels!?! They are such  a fun way to add a little bit of holiday spirit for a low cost. I have spruced up these frames for Christmas, Valentine’s Day and now St. Patrick’s Day. Here is the frame I made for a buck:

Here are the simple steps to making your own:

First, take your dollar frame and Mod Podge it. I like to use matte Mod Podge. (Yes, this is the back of the frame- I forgot to take a picture of the front before I put on the paper:)

Lay the scrapbook paper of your choice over top of the Mod Poged frame and add another layer of Mod Podge over the top of the paper. Allow the Mod Podge to dry and then cut the paper out of the center of the frame and from the outer edges. I like to use sand paper and sand the edges to get rid of any scissors marks or uneven cutting.

Next, I cut out a smaller piece scrapbook paper for the corner and Mod Podged that on. To complete the frame, I hot glued on two rolled burlap flowers.

Here is the completed console table (pre-picture).

It added such a cute touch to the St. Patrick’s Day table.

Happy Monday!

Lexi

Monday, February 27, 2012

Made it Monday: Lucky

Finally, I’m back with some crafts! I am so excited to share what I have been working on with you! After taking down all of my Valentines décor, I started working on decorating my place for St. Patrick’s Day. I had an idea in my head for a while to make an art piece out of a cupboard door I found in a free pile at a garage sale. Here is what I came up with:


I started off by removing the hardware and sanding it down (I love my mouse sander!). There was a good size hole in an awkward spot from where the handle was, so I knew I was going to have to be creative in order to cover that up.


After I sanded it, I primed and spray painted it. Then I roughed up the edges a bit to give it an aged look.


Next, I used my cricut to cut out the word “lucky.” I debated weather to use my vinyl as a stencil and paint on the word or to use the green vinyl. I decided I liked the green vinyl and it would be a lot easier, so I went with that.


To finish it off and cover up that hole, I rolled some flowers out of remnant fabric/burlap and hot glued them on. It is enjoying its new home on my seasonal shelf and I’m lovin’ it!


I finished a lot more fun projects over the past few days and will be sharing them with you soon!


Lexi


Linking to:


www.iheartnaptime.net

Monday, January 23, 2012

Made It Monday: Valentine Decorative Balls

I’m back with another Valentine’s Day project. Usually I’m not huge into decorating for Valentine’s Day, but this year, since we are lacking snow here in Minnesota, all my snowman décor seemed a little out of place. This weeks project is cute little decorative balls that added a hint of pink to the shelf.

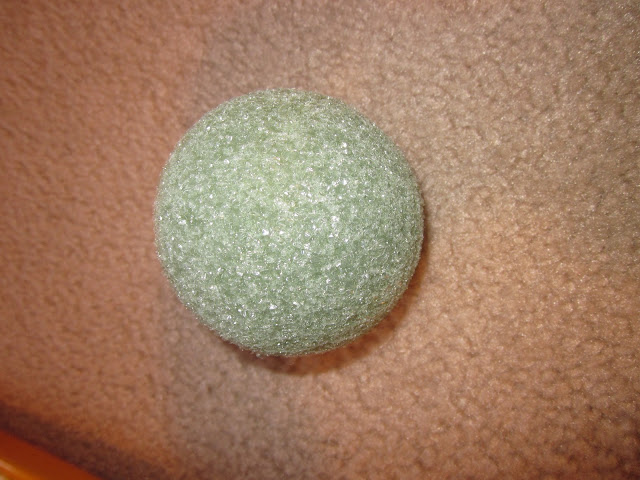
I started out by digging out some Styrofoam balls that I had on hand from a previous project (originally purchased at Michaels).

Next, I cut about one inch fabric strips.

Then, I pinned down the end into the ball, and started wrapping. Each time I wrapped it, I would wrap it back to the beginning point, cut the fabric, and then wrap it again.

Voila! Very easy! I did two polka dot balls and one cream one.

Hope you had a crafty weekend! Next weeks Made It Monday post will show the whole bookshelf decorated for Valentine’s Day, so be sure to check back!

Lexi

linking to:

www.iheartnaptime.net

Monday, January 9, 2012

Made-it Monday

Welcome to the very first installment of Made-it Monday! I am going to try and do this or something similar to this each week (different days of the week will have different titles). Who knows, maybe I’ll even get motivated to do a couple fun installments each week! This week, I am starting off really simple. I took down my Christmas decorations this weekend (sad!) and put up the Valentine’s decorations. I had to change up the picture above my seasonal table to match the Valentine décor. So, my feature for Made-it Monday is the cute little banner on the top of the picture.


The banner adds such a fun touch. I used my cricut to cut out the letters in all sorts of pink scrap papers and to cut hearts out of scrap paper that matches the frame on the table. After attaching the letters and hearts with hot glue to Jute twine (one of my favorite things ever!), I taped it to the back of the frame to hold it in place. If you don’t have a cricut or die cutting machine, most craft stores sell pre-cut letters that would work as well.


Here is a shot of the Valentine’s Day table:


I am loving the blue with the reds and pinks. My favorite thing on the table is the fab blue bowl I got at an antique store that is housing some red Christmas beads.


Linking to:


www.fivedaysfiveways.com


http://www.iheartnaptime.net/

Monday, December 12, 2011

Weekend Projects

Wow, what a weekend! I got quite a few projects done or close to being done and thought I’d share them with you…


The first thing on my to do list was to make a backdrop for my brother for his photography business (shout out to BK Photography…www.brentkastner.com). I fell in love with this fabric and can’t wait to see the photos he uses it in!


Next item up was a shower curtain for my mom. We had found this fabric together one day and both fell in love! (This is actually the same fabric used for my brother’s backdrop-just a different color. We found his fabric the same day.) I still need to finish the top and make all the holes for the shower rings, but it’s so close to being done!


I decided I needed to complete some of my projects on my pinterest boards, so here is one that I did quickly. This business card holder was really easy and fast! http://delilahsmomma.blogspot.com/2010/04/fabric-business-gift-card-holder.html


I jazzed mine up a little by adding a rosette and a hair tie to keep it closed (or it was fixing my problem of using interfacing that was too stiff).


I also whipped up a couple of onesies for some friends. Here are the bow tie ones that I did. I also made a cute cupcake one.


One last little project was finally finishing changing the picture above my console table to a Christmas theme. It had been sitting blank for some time and I’m so happy to finally have it done!


It felt so good to check these things off of my list! Now to tackle present wrapping…


Lexi