Monday, January 30, 2012

Made It Monday: Valentine Shelf Reveal!

For today’s Made It Monday, I have one final Valentine project to share with you. It is the easiest by far!

I had the heart ornament (I got it on a super clearance sale at Michaels last year) and wasn’t sure what to do with it. Then I saw this frame and thought I could maybe dangle it from the back. So I stapled it on the back and viola! It looks cute on the shelf with the shadow box of my grandparents.

And now, the whole bookshelf, all ready for Valentine’s Day:

Hope your weekend was fantastic!

Lexi

Friday, January 27, 2012

Free For All Friday: Cricut Mat

Today’s Free For All Friday is for all my Cricut friends out there. I am going to show you how to make your mat sticky again. If you have a Cricut, you know that your mat can lose its stickiness quite quickly and who wants to keep buying mats?

This tutorial is so simple! I found it online, tried it, and it works great! Here is what you need:

-Aleene’s Tack-It Over and Over glue (at craft stores)

-foam brush

-water

-container to mix it in

Mix equal amounts of the glue and water (about a tablespoon of each) in the container and brush it on the mat. Let it dry completely (takes about 30 minutes or so) and then it is ready to use again!

You can save the extra in a sealed contained and use it again the next time.

Have a fantastic weekend!

Lexi

Monday, January 23, 2012

Made It Monday: Valentine Decorative Balls

I’m back with another Valentine’s Day project. Usually I’m not huge into decorating for Valentine’s Day, but this year, since we are lacking snow here in Minnesota, all my snowman décor seemed a little out of place. This weeks project is cute little decorative balls that added a hint of pink to the shelf.

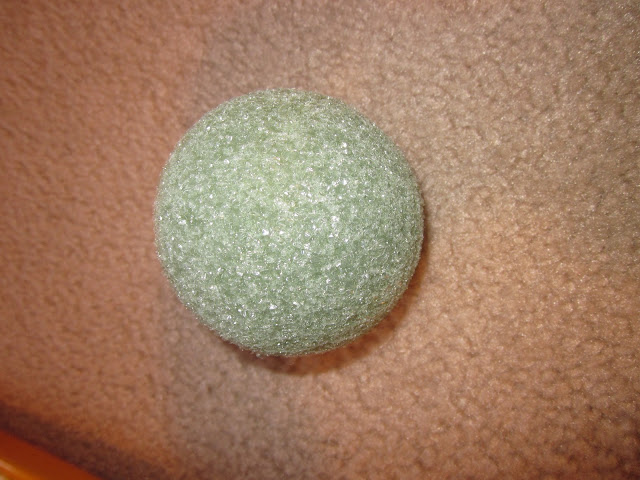
I started out by digging out some Styrofoam balls that I had on hand from a previous project (originally purchased at Michaels).

Next, I cut about one inch fabric strips.

Then, I pinned down the end into the ball, and started wrapping. Each time I wrapped it, I would wrap it back to the beginning point, cut the fabric, and then wrap it again.

Voila! Very easy! I did two polka dot balls and one cream one.

Hope you had a crafty weekend! Next weeks Made It Monday post will show the whole bookshelf decorated for Valentine’s Day, so be sure to check back!

Lexi

linking to:

www.iheartnaptime.net

Friday, January 20, 2012

Free For All Friday: Birthday Celebration and Good Read

Yesterday, the family that I nanny for celebrated my birthday. My birthday isn’t until tomorrow, but since I don’t work on Fridays, we celebrated yesterday. I feel so blessed to work for a family who, even though they are very busy people, they take the time to make my birthday special. They made me these really yummy cupcakes and had gifts all ready.

(this picture was taken at the end of the day when we’d all had our fill of cupcake goodness!)

I couldn’t help but laugh at the three year old I nanny for. Right away in the morning, he pointed out which three cupcakes he had picked for himself-- one for after lunch, one for snack, and one for after dinner. He was very possessive of his cupcakes and made sure to tell all his siblings which ones were off limits for them. (The three he picked out were the ones with the most frosting and sprinkles).

I also got a very sweet card from the six year old that made my day!

On another note, I just finished reading the book Matched by Ally Condie. It was a good read. It reminded me slightly of the Hunger Games, so if you enjoyed those books, I think you’d enjoy this.

Hope you all have a really great weekend!

Lexi

Tuesday, January 17, 2012

Tasty Tuesday: Oatmeal, Caramel and Chocolate Bars

It’s Tasty Tuesday! On Tuesdays, I will be featuring recipes that are delicious, although some may not be nutritious! Today, you are in for a special treat. These bars are always a hit and are very easy to make. I found the recipe on the internet when I was looking for a new dessert recipe.


Here is what you will need:


1 jar caramel topping (about 12 oz.)


1 tbsp. flour


1 pkg. yellow cake mix


2/3 cup butter (melted)


1 egg


2 cups oatmeal (quick oats are best but old fashioned works)


1 1/2 cup chocolate chips


1 cup pecans or walnuts, chopped (optional)


1) Mix caramel topping and flour together in a small bowl- set aside


2) Mix yellow cake mix, butter and egg together. Add oatmeal and mix. Set aside 1 cup of this mixture for the topping. Take mixture and press it into a 9x13 pan that is lined with tin foil and sprayed with cooking spray. Bake at 350 degrees for 14-18 minutes or until golden brown.


3) Sprinkle chocolate chips, then nuts over baked crust. Drizzle caramel on top. Crumble the reserved cake mixture over top and bake for another 20-25 minutes.


4) Cool completely and enjoy!


This is the recipe I use, but have made a couple of adjustments-http://www.bettycrocker.com/recipes/chocolate-and-caramel-oatmeal-bars/0bf6a504-f7ea-4338-8ae6-94c06d984f04


Lexi

Monday, January 16, 2012

Made It Monday: Valentines Decor

A little over a week ago, I pulled out all of my Valentines decorations. I ended up throwing things on the shelves rather quickly, because I had friends coming over and wanted to have my Christmas decorations down. After having the decorations out for a while, I saw a few things that I wanted to change. So, the next couple of weeks of Made It Monday is going to be new Valentines decorations. Here is a picture of the seasonal shelves I wanted to change up:


The first thing I wanted to change was this:


I remember making it last year and not being happy with it, but I didn’t feel like changing it then. Well, this year I did. Here is the new picture:


I used my cricut to cut out the branch, birds and “love” out of vinyl. I applied them right to the glass of the frame and put a piece of burlap in the frame. I also sanded the edges of the frame a bit.


This picture fits in much better with the décor. The old one was just a little too red. Hope you all had a productive and fun weekend! Keep checking back to see what the seasonal shelves look like now!


Lexi


Linking to:


www.fivedaysfiveways.com


http://www.iheartnaptime.net/

Friday, January 13, 2012

Free For All Friday

Hey, guys! Hope you are all gearing up for the weekend! I am excited to share that my new installment for Fridays is going to be called Free For All Friday. Meaning, in my Friday posts, you may see a craft, you may see a recipe, you may see something totally different—it just depends.

This week, project wise, I have got nothing done! This is due to the fact that I have been totally addicted to a book, this book:

I got this book Monday night and have been reading it every spare minute. It nearly killed me that I had to work late on Tuesday, so I couldn’t devote my whole night to reading it! This particular book is book 3 of a 4 book series. It makes me anxious for the final book, which comes out in March!

If you have not read any books by Karen Kingsbury, I would highly recommend doing so! I really have not been disappointed with any of them (and she has wrote a lot!). They are also clean books, which are somewhat hard to find. My mom, sister and I all enjoy them and then really enjoy talking about them after we are finished reading them.

Now that I have finished the book, maybe I’ll get a few things done!

Enjoy your weekend!

Lexi

Monday, January 9, 2012

Made-it Monday

Welcome to the very first installment of Made-it Monday! I am going to try and do this or something similar to this each week (different days of the week will have different titles). Who knows, maybe I’ll even get motivated to do a couple fun installments each week! This week, I am starting off really simple. I took down my Christmas decorations this weekend (sad!) and put up the Valentine’s decorations. I had to change up the picture above my seasonal table to match the Valentine décor. So, my feature for Made-it Monday is the cute little banner on the top of the picture.


The banner adds such a fun touch. I used my cricut to cut out the letters in all sorts of pink scrap papers and to cut hearts out of scrap paper that matches the frame on the table. After attaching the letters and hearts with hot glue to Jute twine (one of my favorite things ever!), I taped it to the back of the frame to hold it in place. If you don’t have a cricut or die cutting machine, most craft stores sell pre-cut letters that would work as well.


Here is a shot of the Valentine’s Day table:


I am loving the blue with the reds and pinks. My favorite thing on the table is the fab blue bowl I got at an antique store that is housing some red Christmas beads.


Linking to:


www.fivedaysfiveways.com


http://www.iheartnaptime.net/

Thursday, January 5, 2012

Car Seat Cover

My new little nephew was in need of a new car seat cover. The cover his two older sisters had used was a little too…pink. After looking at the current car seat cover, I told my sister I could make one. So, when we got together for Christmas, this is what we did:


I found this tutorial online that helped calm the fears that I had about making this with no pattern: http://www.sewingchickstudio.com/Infant%20Car%20Seat%20Tutorial.pdf I just used this as a guide—it didn’t have a flap, but it was good for showing how to measure the fabric.


This is what we needed:


3/4 yard fleece (plus a little extra for the flap)


1” elastic (I think we used about 30”)


button


small elastic hair tie (or some sort of fastener)


matching thread


sewing machine


If you are going to attempt to make this, one thing I would suggest is only cutting about a 6” diameter hole for the head. I made it 8” (I think the online directions said 7-9”), but the fleece stretched after adding the binding and made the whole very large! I also made binding out of fleece to go around the hole for the head, which was a little thick. It worked, just didn’t look professional. This project was quite easy though, and did not take much time. I think the supplies cost my sister under $5, so this is WAY cheaper than buying one.


I am also super excited that on Friday, I will be featured on my friend Brandi’s blog- You and Me Plus 3. Check out her blog at http://paulbrandiandkids.blogspot.com/.


Have a great weekend!


Lexi


linking to these great blogs:


http://www.fivedaysfiveways.com


www.iheartnaptime.net

Monday, January 2, 2012

Etsy Account!!

One of my new year’s goals  was to do something I have been talking about for months…open an Etsy account and get a shop up and running! Well, I finally did it! At this point, I do not have much in the shop—I am having technical difficulties getting pictures to load, but keep checking it—I am determined to get more in the shop. Here is the link to my shop:

http://www.etsy.com/shop/remnantsdiy

Also, just thought I would share with you the most popular post of 2011 on Remnants was:

Pottery Barn Inspired Baskets

http://remnantsdiy.blogspot.com/2011/03/pottery-barn-inspired-baskets_20.html

Thanks for supporting my little blog in 2011! 2012 is sure to bring more fun projects and postings!

Lexi