Hey!!! It has been a while since I have posted! I ran out of storage space for my pictures, so I'm deciding what I want to do. In the new year, I think I will be re-doing the blog (along with my techy brother's help!). Stay tuned...
Today, I just wanted to share one of my favorite Christmas recipes and one new one (that is delish and may be a new fav!). These are what I'm making tonight:
Oreo Balls also known as Snowman Poop or Oreo Truffles. The only difference between how I make them and this recipe is that I dip them in white almond bark (sometimes I use chocolate almond bark, then they are called Reindeer Poop). Mine also don't look quite as nice as theirs:) These are so good and are a favorite among my family. They are also quite popular at Christmas get togethers.
The new recipe of the night is Peanut Butter Pretzel Bites. Yum! I just tried one (I had to let you know if they were good or not:) These are really, really good! I used my Pampered Chef scoop to make these into balls since the mixture was really sticky. I also dipped these in almond bark. I doubled this recipe, but think I need to make another doubled batch because these are not going to last long with my family!
What are you baking this year? Any new delicious recipes?
Tuesday, December 18, 2012
Monday, November 26, 2012
Technical Difficulties
Hey guys! I had a fun post to share with you tonight, but I'm having some technical difficulties, and I am not one bit techy! I will hopefully resolve them soon so I can share today's Made it Monday with you!
Lexi
Lexi
Thursday, November 15, 2012
Thrifty Thursday: On Ice
Confession: I have pinned way too many things on pinterest. I do not know when I'll ever make half the things I have pinned. However, it does come in handy quite often. Like yesterday, for example, when I needed an ice pack and didn't have one. I actually remembered I had pinned how to make a homemade ice pack.
So here is your Thrifty Thursday idea:

3 parts water to 1 cup rubbing alcohol
Throw it all in a Ziploc bag, freeze and you have yourself an ice pack.
For my ice pack, I had a quart sized bag and used 3 cups water and 1 cup rubbing alcohol. It works really well, because it doesn't freeze solid. It is still movable. I think it does work better if you let it freeze overnight before using. I tried it after freezing it for a day and then again the next day and it was much firmer the second day.
Word of advice--make sure your bag is tightly sealed before using:)
Lexi
Wednesday, November 14, 2012
What the Word Says Wednesday: That 3 Letter Word
Hey guys! We are half way through the week and just a little over a week away from Thanksgiving! Can you believe it? Where has the year gone? Anyway, today I want to share some thoughts I have been having about a little three letter word that has huge implications--SIN.
One night at a Bible study I was attending we started talking about sin. As I was thinking about our discussion after I left, I realized how skewed my idea of sin is. Often in my thinking, I base how bad a sin is based on its consequences. If I get caught speeding, I get a ticket, if I get convicted of murder, I get jail time or sometimes death and so on. But then the truth hit me, sin is sin, no matter how big or small the sin is, it is all exactly the same to Jesus.
I had to do a self check that night as I was driving home. There are times where in my mind I am so quick to judge a person because they have or are committing a sin that is blatantly laid out as sin in the Bible. But as I was pondering this in my car, I was driving over the speed limit; breaking the law, a sin. Pretty sure in the past few days I had wanted something that someone else had. Also a sin. I could go on. Maybe my sin isn't evident for all to see or maybe I think it is just a "small" sin, but Jesus sees it.
Friends, this Thanksgiving we all have something to be very thankful for. No matter what sin we have committed/are committing, when we ask for forgiveness, Jesus wipes all our sins away. Not only that, he doesn't keep record of them! Hebrews 8:12 says "For I will forgive their wickedness, and will remember their sins no more." Psalm 103:12 says "As far as the east is from the west, so far has he removed our transgressions from us." What a great feeling to know that God isn't sitting in heaven with His book of "Lexi's Sins" or "{insert your name here}'s Sins." My sins have been removed! No matter how much Satan tries to bring up those past sins, we can take comfort in knowing the TRUTH. Jesus has removed those sins!
Lexi
Monday, November 12, 2012
Made It Monday: As Seen on Etsy
Hey guys! I don't have a regular post for Made It Monday today. Rather, head over to my Etsy shop. I am working on getting it updated with all of my handmade goods, like:


I'll be back later this week with some new projects and such...
Lexi
Tuesday, November 6, 2012
Tasty Tuesday: Green Punch
Happy voting day! Today's Tasty Tuesday is going to be short and sweet so you can get back to watching the polls:) I thought I would share the recipe for the green punch that I made for my nephew's Batman party. It was really good and would be perfect for a Christmas party or St. Patrick's Day get together.

Here is what you'll need:
1 large can of pineapple juice
2 packets lemon-lime kool aid
1 liter ginger ale
1 1/2 cups sugar (recipe called for 2 cups, but we used 1 1/2 and it was plenty sweet)
1 quart water
We all enjoyed the "Joker Juice!"
Lexi

Here is what you'll need:
1 large can of pineapple juice
2 packets lemon-lime kool aid
1 liter ginger ale
1 1/2 cups sugar (recipe called for 2 cups, but we used 1 1/2 and it was plenty sweet)
1 quart water
We all enjoyed the "Joker Juice!"
Lexi
Monday, November 5, 2012
Made it Monday: DIY Key Holder
Hope all of you had a great weekend and got to enjoy an extra hour of sleep (sorry AZ friends)! This weekend, my brother came to my place for a visit. He recently moved into a new place, and needed a key holder. When we were walking around Ikea, he saw a chalkboard key holder that he really liked. It looked really cheap though, and I told him we could make something way nicer.
Using the Ikea piece as inspiration, we picked up this frame at Target on clearance for $6. I really don't know who would have paid $20 for this thing...(I did save the ribbon from the inside though, as we are planning a cowgirl birthday party for my niece in December. Thought I'd be able to make it into something cute.)


Using the Ikea piece as inspiration, we picked up this frame at Target on clearance for $6. I really don't know who would have paid $20 for this thing...(I did save the ribbon from the inside though, as we are planning a cowgirl birthday party for my niece in December. Thought I'd be able to make it into something cute.)

On a side note, see how the clearance sticker is right on the glass...I used my Norwex rag to get off the sticker goo. It comes right off--way easier than using rubbing alcohol. If you've never heard of Norwex, go check them out. I love their stuff (no, I do not sell their products, just love them!).
First step was to get rid of that hideous ribbon/background and paint the glass with chalkboard paint. I did three coats of paint. While the paint was drying we added some screw in hooks to the bottom of the frame. Once it was dry, we put the frame back together. It was that easy! Here is my brother displaying the finished product Vanna White style...

 |
| Sorry this picture is the wrong way! |
Lexi
Like Remnants on facebook!
Sunday, November 4, 2012
Remnants on Facebook!
Hey guys! Just wanted to drop a quick note for you all to check out Remnants on facebook. Head on over and like the page. I update the page quite often and put sneak peeks of projects I'm working on on it.
Enjoy the rest of your weekend and come back tomorrow and check out the DIY chalkboard keyholder.
Lexi
Monday, October 29, 2012
Made it Monday: Bat-tastic Par-tay!
So, I've been MIA for a while from the blog! Sorry! I have been busy stocking up my supply of Remnants items as I had a craft show last weekend and another one coming up in December. Here is a quick peek at my table from the craft show this weekend. I was also selling scarves and necklaces my mom makes.


I used my cricut and Sure Cuts A Lot program to cut out all the Batman symbols for the banner, decorations, and onesie. I was very fortunate that the bridal showers I hosted this summer/fall had color schemes that when put together made up the Batman colors!! I had saved all the ruffled crepe paper from the showers and was able to reuse it as well as the blue and white poms.
Hope you made it through all the pics today! I'll share the cape and cake tutorials later on.
Have a great week!
Lexi


But now, back to Made it Monday! In this post I talked about the Batman themed 1st birthday party my sister and I were throwing for my nephew. Well, the party happened and it was BAT-TASTIC! We had such a fun time and everything turned out so cute! Warning: tons of pictures today!!!
 |
| The Big Picture |
 |
| Joker Juice and Batman Bombs |
 |
| Batmobile Wheels, Mini Baterangs, and Catwoman Tails |
 |
| My sister made the cake while I decorated. I cut out the symbol with my cricut for her to trace. |
 |
| Reserved for Batman. |
 |
| Balloon decor- I wanted to have balloons on the buffet with the food, but small town=no helium. |
 |
| Two Face Tacos |
 |
| The Birthday Boy himself! He's sporting his Batman Birthday Boy onesie with cape. |
 |
| Happy Birthday! |
 |
| The proud big sister in her batman shirt. |
 |
| The other proud sister who wished she had a batman shirt. |
 |
| Myself and the birthday boy. |
 |
| I found superhero tatoos and stickers on clearance for a quarter so I picked them up for the big kids at the party. It was a tough choice for cousin Cambria. |
 |
| Present time! |
 |
| Cousin Kynslee thought the food was delish, as you can tell by her face.
|
Hope you made it through all the pics today! I'll share the cape and cake tutorials later on.
Have a great week!
Lexi
Monday, October 15, 2012
Made it Monday: Batman!
In just a couple of weeks my sweet little nephew, Trig, will be turning ONE! Time goes so fast! Usually our family isn't much into throwing big birthday parties, but I love throwing parties, so here we are. My nieces wanted to have a Batman party for him, and after talking with my sister, we decided we could make this really cute. The party will be this weekend, so I'm busy making decorations for it. The first thing I decided to make was this cute sign:


The process to make this was quite simple:
First, I found this scrap piece of wood from a previous project. It was a little smaller than I wanted, but by using it, I didn't have to go buy more.

Then I painted it yellow with some craft paint. Technically, I probably should have primed it, but I was being lazy.
Next, I cut out the image with my cricut. I found the image and font online. I transfered it to the piece of wood.

Finally, I spray painted the whole thing black. Once it dried, I took off the vinyl.


I love how it turned out and it will be a great piece for the party. Best part about it is that it was free because I had all the supplies on hand!
Lexi
Tuesday, October 9, 2012
Tasty Tuesday: Pumpkin Scones
Fall has arrived. I have been seeing a ton of recipes pop up that look really good, but all include pumpkin, which I'm not a huge fan of. Then I ran across this recipe--Pumpkin Scones. The picture looked just like the ones at Starbucks, which I had tried and were delish!
I decided I'd give the recipe a try. I figured they couldn't be too bad if there is only a half cup of pumpkin in them:) They were so good and tasted just like the Starbucks version. Here is the recipe:

I decided I'd give the recipe a try. I figured they couldn't be too bad if there is only a half cup of pumpkin in them:) They were so good and tasted just like the Starbucks version. Here is the recipe:

Ingredients:
For the Scones:
2 cups all-purpose flour
1/4 cup and 3 tablespoons granulated sugar
1 Tablespoon baking powder
1/2 teaspoon salt
1/2 teaspoon ground cinnamon
1/2 teaspoon ground nutmeg
1/4 teaspoon ground cloves
1/4 teaspoon ground ginger
6 tablespoons cold butter, cut into 1-inch cubes
1/2 cup canned pumpkin puree
3 tablespoons half-and-half
1 large egg
For the Powdered Sugar Glaze:
1 cup plus 1 tablespoon powdered sugar
2 Tablespoons milk
For the Spiced Glaze:
1 cup plus 3 tablespoons powdered sugar
2 tablespoons milk
1/4 teaspoon ground cinnamon
1/8 teaspoon ground nutmeg
1 pinch ground ginger
1 pinch ground cloves
Directions:
Preheat the oven to 425 degrees F. Line a baking sheet with parchment paper; set aside.
In the bowl of a stand mixer fitted with fit the paddle attachment, stir together the flour, sugar, baking powder, salt, cinnamon, nutmeg, cloves and ginger. Add the butter and toss with a fork to coat with the flour mixture. Mix on medium-low speed until the texture resembles coarse cornmeal, with the butter pieces no larger than small peas.
In a separate bowl, whisk together the pumpkin, half-and-half and egg. Fold wet ingredients into dry ingredients, and form the dough into a ball. Pat out dough onto a lightly floured surface and form into a 1-inch thick rectangle about 4 inches by 12 inches. Use a large knife to slice the dough making three equal portions. Cut each of the portions in an X pattern (four pieces) so you end up with 12 triangular slices of dough. Place on prepared baking sheet. Bake for 14-16 minutes, or until light brown. Place on wire rack to cool.
While the scones are cooling, make the powdered sugar glaze by mixing the powdered sugar and milk together until smooth. When scones are cool, use a pastry brush to spread plain glaze over the top of each scone. Allow to firm.
While the powdered sugar glaze is firming, combine all of the ingredients for the spiced glaze. Drizzle over each scone and allow the icing to dry before serving (about an hour).
Recipe Note: you can freeze unbaked scones and enjoy hot from the oven scones any day of the week. Just freeze on a baking sheet until firm, tightly wrap in plastic wrap and place in a ziploc freezer bag. When ready to bake just pop into the oven straight from the freezer, no need to thaw. Just add a few more minutes to the baking time.
I skipped the spiced glaze on mine due to lack of time. I also didn't allow them to cool enough before I put the glaze on, but they were still so good!
Enjoy!
Lexi
Monday, October 8, 2012
Made it Monday: Personalized Doormat
As I have mentioned in previous posts, I had a couple of friends getting married over the last few months. I wanted to do a DIY wedding gift along with something off of their registry. As I was thinking what I could make, I remembered something I had seen in a Ballard Designs catalog a while back- monogrammed doormats (I believe they also sell personalized doormats). These bad boys run for about $90.


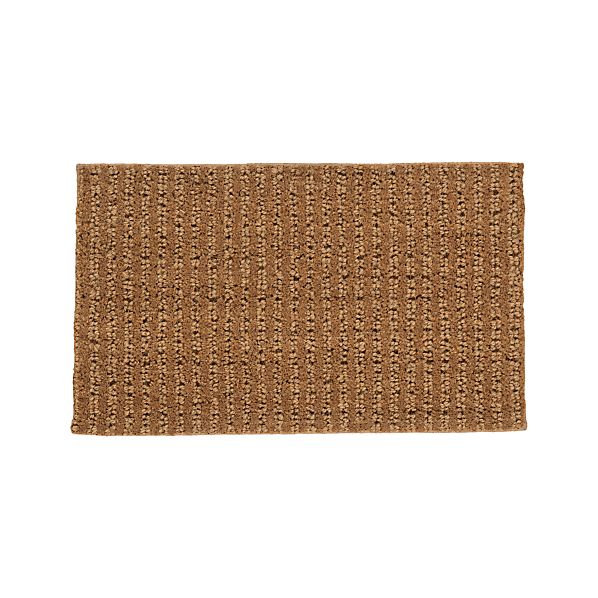

I was pretty sure I could make one of these for significantly less. So, I started my hunt. It was a little tricky finding plain doormats,but I found one at Home Depot for $7. I bought two and set out to make the personalized mats.
Once I got home, I cut out the couples' last names out of vinyl with my cricut. Using the vinyl as a stencil, I laid it out on the doormat. It was not sticking. I tried setting heavy objects on top of the vinyl to get it to stick, but it didn't work. So, I decided to take back the mats and look for something the vinyl might adhere better to.
I scoured a few stores, then tried good ol' google. I found a nice mat at Crate and Barrel for $15 that I thought may work a little better.
Luckily these shipped quite quickly and I gave it another try. The vinyl stuck a little better, but still wasn't great. I decided to just give it a try.
I stuck on my stencil and spray painted it black. On the first attempt, I put newspaper around the edges that the stencil didn't cover, to protect them from getting spray painted, but the spray paint blew the edges up a bit. This left a few minor black spots.
**One important thing I learned from the first mat to the second: Put sticky vinyl around the outer edges of the doormat as well so the spray paint doesn't get on the edges of your mat.**
I spray painted two coats of black paint on each mat and once completely dry, removed my stencil.
The mats were not completely perfect for my perfectionist self, but they turned out pretty well. They did turn out to be more work than I thought (mainly because the vinyl wouldn't stick), but if you want a personalized door mat and want to save a bunch of money, this is the way to go.
I think another option would be to use craft paint instead of spray paint, but I wasn't sure how that would hold up outside in all the Minnesota elements. Here is how one turned out in the end. I thought I had a picture of the other, but apparently I don't. I did a script font on the other doormat.

Have a great Monday!
Lexi
Monday, October 1, 2012
Made it Monday: Onesies & Shirts Galore!
Over the past few weeks, I have been making some fun shirts and onesies- some just for fun, some for the etsy shop. I LOVE my heat and stick vinyl!
My brother and I competed in a Mud Chug...a 5k with obstacles. Our team was "team dumb and dumber." The back of our shirts said "what was I thinking?!" As you can see from the picture, it was a nice rainy day. Pretty ironic considering that there hadn't been rain all summer until that day!


My brother and I competed in a Mud Chug...a 5k with obstacles. Our team was "team dumb and dumber." The back of our shirts said "what was I thinking?!" As you can see from the picture, it was a nice rainy day. Pretty ironic considering that there hadn't been rain all summer until that day!

Each year, my family attends Lifelight Festival in Sioux Falls, SD. It is a three day Christian music festival. We love it! This year, I made the nieces and nephew some shirts/onesies.


Here two of the nieces are sporting their shirts:

Here are a few onesies I've been working on. I am doing a craft show the end of October, so I'm trying to add some new designs. I'll also put them on my etsy account...eventually!


Thanks for taking a peek!
Lexi
Sunday, September 30, 2012
Bridal Shower
So, this post was supposed to happen on Free for All Friday, but, lets just say I'm a little behind! One day I'll be really prepared and have all my posts for the week done on Sunday!
Since last week I was posting about the bridal shower I threw for my friend, I wanted to show you the whole shebang! Now, as you are looking at the pictures, keep in mind that my younger brother got all the photography genes in the family.
Since last week I was posting about the bridal shower I threw for my friend, I wanted to show you the whole shebang! Now, as you are looking at the pictures, keep in mind that my younger brother got all the photography genes in the family.
 |
| Drink table minus the coffee |
 |
Gift Table |
 |
| Guest tables |
 |
| Bride's chair |
 |
| Food table minus some of the yummy foods |
 |
| Close up of menu |
 |
| Close up of card holder--don't you love the scale I found at an antique store!?!
I had so much fun with this shower! Hope you can get some ideas for the next shower you throw!
Lexi
|
Tuesday, September 25, 2012
Tasty Tuesday: Orange Dream Punch
Continuing with the bridal shower details, for today's Tasty Tuesday post, I will be sharing the punch recipe used at the Bridal Shower: Orange Dream Punch. This is so simple-only 3 ingredients-and tastes just like an orange creamsicle!
Ingredients:
1/2 gallon orange sherbet
6 oz. frozen orange juice concentrate (half of a regular can)
1 (2 liter)bottle ginger ale
Mix thawed OJ and ginger ale. Spoon in orange sherbet. Yummy!

| This is the picture from the recipe I followed. I forgot to take a close-up of the punch. I didn't add fresh oranges to mine. |
1/2 gallon orange sherbet
6 oz. frozen orange juice concentrate (half of a regular can)
1 (2 liter)bottle ginger ale
Mix thawed OJ and ginger ale. Spoon in orange sherbet. Yummy!

Lexi
Subscribe to:
Comments (Atom)